


+safety instructions


Keep the device even with the ground.

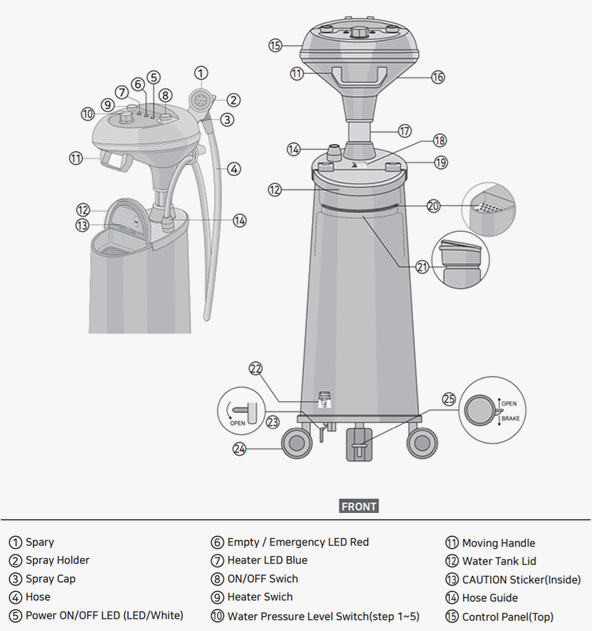
Plug in the device. Turn on the power switch
at the top right-hand corner on the control
panel, and the red LED light will turn on right
next to the switch.

Open the water tank of the device.
Fill it with water up to the curved mark at
the upper part of the tank.

Close the water tank,
and the device is ready for use.

Use the 5-level water pressure knob to
adjust the water pressure according to the
customer’s scalp condition.

Turn on the green switch (I/O) at the top
left-hand corner of the control panel, and the blue LED light will turn on next to the switch.
Then, the device automatically
puri-fies and heats up the water to the ideal
tem-perature(37ºC ±0.5) changing it to
‘purified anion water’ after 3~5 minutes.

With the blue LED light turning on and off
automatically, the device maintains the
water temperature at 37ºC ±0.5° not to cause any damage or burn on the scalp.

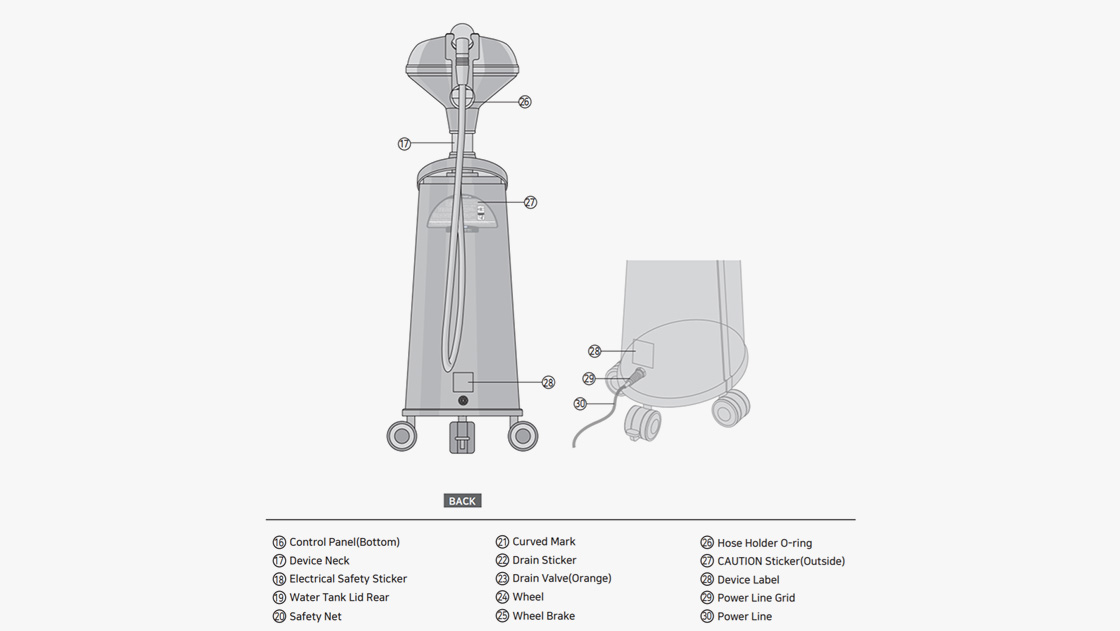
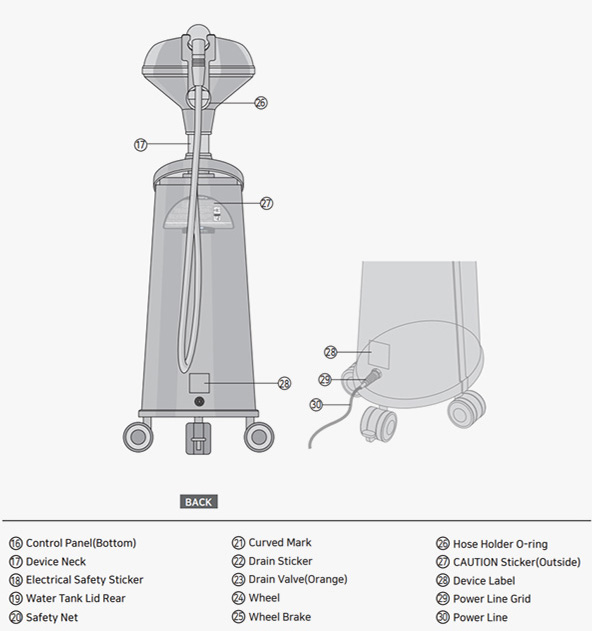
For the evacuation of the remaining water in
the tank or the contaminated water from
the cleaning, use the orange valve
protruding below the underside of the
device near the front-left wheel.
Turn the valve counter-clockwise all the way,
and it will let all the remaining and
contami-nated water come out.


Do not use the device more than 2 times a
week per person and be careful not to use
the water pressure at Level 3 or higher in
the beginning stage of the treatment.

If there is little or no water in the water tank
while in use, the red LED light (Water Empty)
will turn on in the middle of the panel.

After the procedure, be sure to turn the
water pressure control switch “OFF”.
When not in use or leaving work,
turn off the power switch and disconnect
the power plug.